Pages

Showing posts with label sticky back canvas. Show all posts

Friday, 30 July 2010

A tale of two mirrors, well OK 4!!!!

I've been to a few workshops since my last post and have suffered the same, if not more, exhaustion.  Two were back to back, the week before treatment so you can imagine how tired I've been!

Anyhoo, onto mirrors.  Every crafter worth their salt has discovered the humble Ikea mirror.  Sold for around a pound, they can be altered in any number of ways and are a great substrate to use for just about any technique.  They come in plain, black and red (at the moment) and I have had at least one in each colour.


I've been to two workshops that used mirrors as their basis and we learned loads of techniques around decorating the mirror.

The first one was a while ago and was a 'Ranger Techniques Mirror' and dealt with the crafting goodies produced by Ranger for Sir Tim of Holtz, Suze Weinberg and Claudine Hellmuth.

First we painted the mirror using Claudine Hellmuth paint.  I chose blue, while everyone else seemed to choose light colours.  Then Lynn showed us how to pour UTEE (Ultra Thick Embossing Enamel)  into molds, and onto stamps with a memory frame on top to create a framed piece of textured UTEE.  As I wobble, Lynn poured mine for me and as you can see the results are fantastic!  Once solidified, I dusted Perfect Pearls over the top to accent the texture.


Then we all chose an image from a pile of pages Lynn had printed out from various free image sites.  I chose a lovely lady and used Sticky Back Canvas to transfer the image using the technique Lynn had used during the Open Day (see previous post).  I left some of the 'lint' from the back of the paper on the image as I liked the way it looked!


Then Lynn showed us how to stamp on Sticky Back Canvas using Golden Gel Medium as a resist and painting over it with a wash to bring out the resisted image.  Unfortunately I just couldn't get my stamping to resist.  I did everything right and tried 3 times (even with Lynn watching me) and I still couldn't do it.  Absolutely no explanation.  I will try it again.  So Lynn had to give me one she had done.

I finished it off using fragments over stamped images, some alcohol inked and some sprockets and gears.

Next to the sprockets and gears is a UTEE flower made from a mold (made with mold 'n' pour) from an ornate button.


And finally the finished mirror.  Excuse the view of my spice rack in the mirror.  Its really difficult to get good light without things reflecting in the mirror!


The next mirror is done with wax.  This was in a workshop done last week called 'Waxing the Melt Pot Way'.

We started by choosing images from a pile Lynn had provided for us again as well as magazines.  Then we placed them onto the mirror to get the presentation right, then heated the wax up in our melt pots.  You have to heat the wood (or any solid substrate you're using) first so that the wax will adhere properly.  This must be done in between each wax layer too.  The paper has to be completely covered in wax by placing it in the melt pot and using tweezers to take it out and apply it to the mirror.  You have to burnish the paper between every paper layer to ensure good adhesion.

Once we done this and had all of our paper waxed to the mirror, we started to apply wax to the parts of the mirror with no paper on, with a natural bristled brush.  Then  we started to build up the wax on the corners on the mirror and add texture using stamps (they must be heated first) and and onion net, but anything can be used. 


We used Perfect Pearls and Bedazzles to highlight the texture on the mirror, and here is the finished article.  I haven't had the inclination to clean the mirror yet, so it still has dribbles of wax on it.  Also the pink feet you can see are from a Piglet beanie I have sitting on the top of my wardrobes!


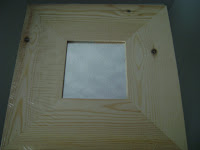
And the fourth mirror I have to show you is one loosely based on one I saw in Craft Stamper magazine a while ago.  It uses Ten Seconds Studio (TSS) metal with alcohol inks to colour it.  I've made another 2 in plain silver as gifts since making this one.
Wednesday, 7 July 2010

Another workshop and another bout of sheer exhaustion!!

Saturday saw Jo and I attending another workshop, this time run by Lynn Robinson-Hunter and called 'Canvas Creations'.  All we knew was that it was on canvas (suppose the name gave it away LOL!) and that we were gonna be working in a neutral palette, a first for both me and Jo.  We're the ones that are practically guaranteed to have the brightest colours of any workshop which are usually purple and green for Jo and orange for me!!

I drove on Saturday as I felt fine.  We met the other two participants, Joan and Karen.  Joan's daughter Rachel was ill and lying down in the car outside.  Bless her she finally made it into the workshop for about the last hour or so, but she got so much done!!

There were 8" x 8" deep frame canvasses waiting for us on the table with some dictionary paper and a Tim Holtz Ornate Plate. Lynn then began to tell us of the colours we could use which she had totally restricted to the neutral palette and that we had to try and build texture on the frame.

I began by using one of the Tattered Angels Masks on the top left hand corner of the canvas and pushed Golden Fibre Paste through it with my finger - YUK!!!!  I hate having anything gooey on my fingers.  Lynn had gone in search of palette knives, but I just thought 'be brave' and off I went in with my finger.  I was still picking bits out of my nails on Sunday even though I'd washed my hands thoroughly!!!

I then used scrunched up dress making pattern tissue paper crumpled into watered done PVA glue and arranged it in the top right corner of the canvas.

While we waited it for these to dry Lynn showed us how to make flowers from fabric by twisting round.  I had quite a bit of difficulty with this as I couldn't manage to hold the flower as well as twist the fabric at the same time, so Lynn made mine for me.  That's how its so perfect!!


By this time the fibre paste and tissue paper had dried.  For anyone who knows Graphicus you'll know how hot it was in there!!  Lynn asked us all to hand draw a flower (EEEEK!!) onto the canvas and begin sticking paper on as well.  I stuck pieces of torn music as well as a gorgeous piece of hand made paper Lynn gave us onto the canvas with Golden Matte Gel Medium, being careful to leave my 'flower' undisturbed.

Once we'd done that we had our lunch and browsed the shop and bought some 'necessary' bits and pieces with the 10% off for attending the workshop, but who needs an excuse?!

Then we started to paint.  This was difficult for me because although all the colours went together I had a problem choosing which to use!  I started with a Ranger crackle paint which dried almost immediately.  Then I moved onto Ranger Paint Dabbers in various shades and a Ferro paint in Old Brass.  I paint my 'flower' in using paint from a Paint Dabber in copper squeezed on my mat and watered down slightly then drew round it with a black Sharpie pen.

Once I'd finished painting, I used melted wax to dribble down the canvas at strategic points.  In other words, I slapped it on and it went where it wanted!!


This photo shows the wax over the fibre paste and you can see the texture peeking through.  I had (for some unknown reason) decided to trace round the curls in the texture with black.  Putting the wax over it toned it down - thank goodness!!


Once all of this was dry / cooled I applied gold leaf in certain areas just to highlight.  Lynn had to stop me before I went gold leaf mad!!

Earlier we had each done a canvas transfer using Claudine Hellmuth Sticky Back Canvas from images Lynn provided.  I chose the Mona Lisa.  The idea was to put the ornate plate over the part of the image we wanted and place it on the canvas.  I chose her face (obviously!) and Lynn triple embossed the image with the frame in place for me.  You can see the texture of the dress pattern on this photo too.

Once we had the canvas the way we wanted them, Lynn showed us how to cut scallops from the dictionary paper.  One quarter of a piece of dictionary paper was enough to fill one side of the canvas and the depth was right once we'd cut the scallops.  We adhered them using Golden Gel Medium again and once dry we drew round them with a black Sharpie pen like we had with the flower. Then Lynn gave each of us 2 ornate head nails to bang into the sides of the canvas and a piece of wire to hang it with.  I had to get Lynn to do this for me as there was no chance of me bending the wire properly, and me with a hammer ..... NO!!!

Once all of this was done, Lynn gave us each a selection of ribbons to tie to the wire.  I had decided to add another embellishment to the canvas when I got home and was 'with it' again.  I'd told Lynn it would be one of the Tim Holtz Word Keys.  On Tuesday when I felt OK, I tried one of the keys and it just didn't work.  So I made wax seals with silver sealing wax spelling out the word ART and touched them with gold rubbing wax.  That was what I needed to finish it off and it is now sitting waiting to be hung.


And here is the finished canvas.  I love it even though I was completely exhausted after doing it and have only just recovered now!

Sunday, 13 June 2010

Graphicus Open Days

I had a VERY tiring but VERY inspiring day yesterday at Graphicus in Barnard Castle.  Graphicus is a wonderful craft shop which is very simply Crafting Heaven.  As it was an Open Day there were lots of demonstrations going on and I sort hopped between them all. 

Firstly there was Glenda Waterworth who owns Graphicus showing off their new Mermaid stamp plates and she was doing some absolutely AMAZING colouring with the Copic Ciao markers. 
Here are some of the wonderful samples Glenda made yesterday.


This is Lynn Robinson-Hunter.  She usually does loads of Ranger techniques on tags using distress inks.  However yesterday she was amazing people with an image transfer technique using Claudine Hellmuth Sticky Back canvas.
Lynn places the sticky back canvas on to the front of the image.  Yes you read right.  It covers the image completely.  Then you burnish it and spritz the paper and rub it off the back of the canvas.  It is quite relaxing doing this or watching someone else doing it!

She was also doing a lot with beeswax.  This technique is wonderful!!!  If you'd like to know more about this technique there is a workshop running at Graphicus on Thursday 22nd July.  Details are available on the Graphicus websiteJust go to the tab on the left marked 'Book a workshop'.  These are pictures of the book boards that she made yesterday and Friday. Something along these lines will be made at the workshop. Please come along!


Lesley Wharton was also there doing demonstrations using Clarity Stamps and techniques as well as the new CD (which is gorgeous!!).  She was also using the new Mermaid stamps.

Judith Walton was demonstrating the Ranger Melt Pot using Ultra Thick Embossing Enamel (UTEE) to make jewellery.  She was using molds made with Mold 'n' Pour and filling them with UTEE and that is how the key was made in the picture.
It was a brilliant day, but I am paying for it now as I am exhausted.  I've been in bed all day and my legs are really hurting even though Graphicus kindly gave me a chair at each demo.  A big thanks to David for providing the food (and my extras for my tea!) and Carrie for giving me a lift there and back!